Turnaround time:
2.2 business days
Create blank template
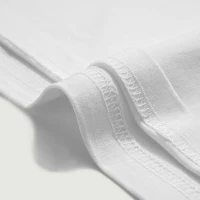
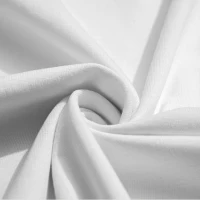
Easy to pair with anything, this crew neck tee is the perfect base layer for any casual outfit. The breathable cotton fabric is incredibly smooth and soft without any loose threads, keeping your body cool and fresh when the temperature rises.
Features
Ribbed crew neck
Set-in short sleeves
Classic fit
Fabric
100% combed cotton
Pre-shrunk
Bio-polished
Silicone-oil added
180g/m²
Process
Cotton-polyester ribbed collar
Single-needle stitched neckline
Tear-away label
Care instructions
Wash on the reverse side with neutral detergents. Do not soak, expose to the sun, and bleach. Iron, steam, or tumble dry at low temperature(max 30℃ or 90℉).
Size guide
Imperial
Metric
XS
S
M
L
XL
2XL
3XL
4XL
5XL
Length
26.4
27.6
28.3
29.1
29.9
30.7
31.5
32.3
33.5
Chest
18.9
19.9
20.9
21.9
22.9
24.0
25.6
27.6
29.6
Sleeve length
7.5
7.9
8.3
8.7
9.1
9.4
9.8
9.8
9.8
This size guide
shows product measurements taken when products are laid
flat. Actual product measurements may vary by up to 1″
(2.5cm).
Our real-time inventory keeps you informed of the availability of
each product variant. Once a variant is marked as "Out of stock", we
will replenish it within 5 business days. Variants marked as
"unavailable" are not included in our inventory.
In stock
Out of stock
Unavailable
XS
S
M
L
XL
2XL
3XL
4XL
5XL
White
Black
Dark Navy
Embroidery details
Reference garment size:
L
()
Garment part
Embroidery Frames
Front
3″ × 4″
3″ × 12″
12″ × 12″
Back
3″ × 4″
3″ × 12″
12″ × 12″
Left Sleeve
3″ × 4″
3″ × 12″
Right Sleeve
3″ × 4″
3″ × 12″
Embroidery frames can be placed anywhere within the blue area.
Embroidery Specifications
Embroidery Machine
Tajima TMEZ-S1501C
Embroidery File Format
.DST
The .dst file, a key format in the embroidery
industry, serves as the instruction file for embroidery
machines. It contains detailed directions for needle movements,
thread selection, and stitch types, enabling intricate patterns
to be stitched onto fabrics. (What Is a DST File and How to Get One)
The .dst file, a key format in the embroidery
industry, serves as the instruction file for embroidery
machines. It contains detailed directions for needle movements,
thread selection, and stitch types, enabling intricate patterns
to be stitched onto fabrics. (What Is a DST File and How to Get One)
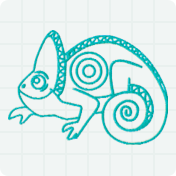
Chameleon.dst
)
Upload professional embroidery designs in .dst format
and we'll bring them to life.
Text
Over 110 fonts are available for selection. You can
customize font position, size, color, rotation, and
shape.
For a detailed guide on creating the perfect embroidery
file, please refer to this
link.
Embroidery types
We offer two embroidery techniques: flat embroidery and
3D Puff embroidery.
Flat embroidery:
Stitches lie flat against the fabric surface for a
clean, fine, detailed finish.
3D Puff embroidery:
Foam backing is placed under the stitches so the design
is raised, creating a full, dimensional look.
Pricing
You can add multiple embroidery frames (areas for
placing embroidery on garments) to each product
template. Each frame has different dimensions, stitch
counts, and prices:
Frame
Stitches(included)
Price
Extra Stitches
3D surcharge
Digitizing fee
3″×4″
15000
USD 1.99
1000 stitches / USD 0.3
USD 0.98
USD
5.99
3″×12″
20000
USD 3.49
1000 stitches / USD 0.3
USD 0.98
USD
5.99
12″×12″
25000
USD 4.99
1000 stitches / USD 0.3
USD 0.98
USD
5.99
Please note that Multi-Process Fee of USD 2.99
applies when combining embroidery with other
processes.
* The number of thread colors you select won't change
the cost of your embroidery.
* If you upload an image for embroidery design,
digitization fee
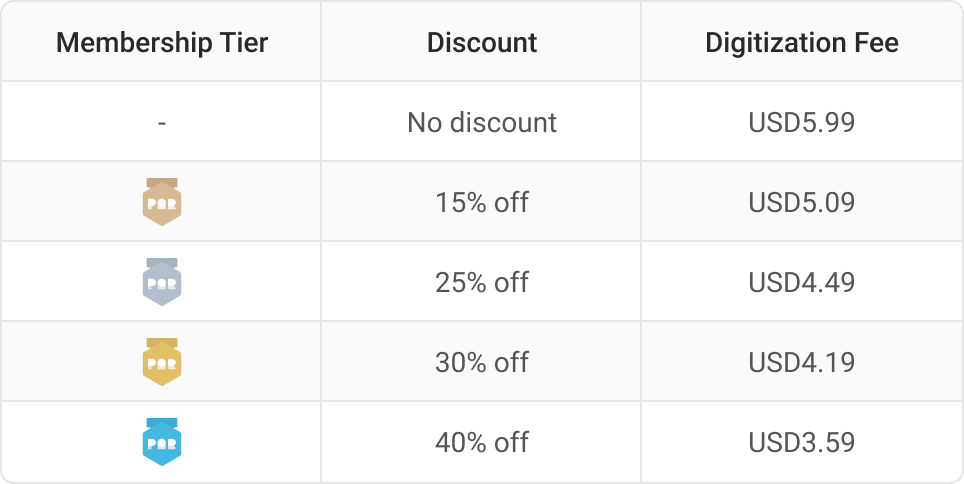
The following are standard digitization fees based on
membership tiers:
will apply.
* When you upload a DST file for embroidery design,
there's no digitization fee.
Do's and Don'ts
1. Avoid complex details or small text
Fine details can be lost due to texture size limits, and
extremely thin elements and small text often don't turn
out well in embroidery.
2. Use proper stitch density
Since we use the Tajima TMEZ-S1501C embroidery machine
and COATS Sylko 120D thread, we recommend that the
stitch density of the uploaded DST files be controlled
between 0.3mm and 0.5mm. Excessively dense stitches may
damage the fabric, cause puckering, and affect the
garment's elasticity. Conversely, stitches that are too
sparse may lead to edge fraying and loose threads,
compromising both appearance and durability. Proper
stitch density ensures that embroidery patterns remain
clear, secure, and do not damage the fabric.
3. Choose appropriate garments
The type of fabric you choose is key to your
embroidery's appearance. For big or detailed designs
with sharp edges, go for thicker fabrics like
sweatshirts. They give better support and prevent fabric
damage. Lighter fabrics like thin T-shirts, especially
those under 200g, are better for smaller, simpler
designs to keep the fabric smooth.
4. Minimize color changes
Our Design Creator limits the number of color changes to
30 for a single DST file. For multi-color designs, we
recommend that the same color count as only one color
change to streamline the color sequence and reduce
redundant color change (COLOR_BREAK) commands.
5. Avoid designs requiring exact alignment of embroidery
and DTG
Even if the product preview appears perfectly aligned,
exact position matching cannot be guaranteed in actual
production.
Scaling Guide
Embroidered patterns will maintain their actual size
across all garment sizes. If a garment has both DTG and
embroidery on the same side, neither will be scaled.
HTV details
Reference garment size:
3XL
(Scaling guide)
Garment part
Design area
Front
Top
Back
Top
Left Sleeve
Left Sleeve
Right Sleeve
Right Sleeve
HTV can be placed anywhere within the blue area. Max 5 designs per garment part.
Pricing
You can add multiple HTV designs per product template.
Select different materials for each design. Pricing
depends on size and material choice:
Material type
Base price (Up to 20 in²)
Extra area fee (Per additional in²)
Each design is charged separately.
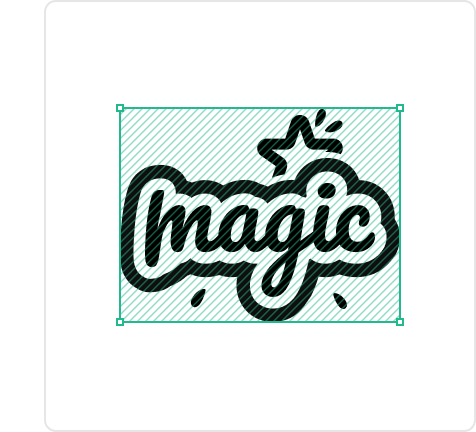
Area is calculated based on the bounding box of the
artwork.
Print file guidelines
1. SVG Files
Ensure the design is composed entirely of vector paths;
do not embed JPG/PNG images within the SVG.
2. PNG Files
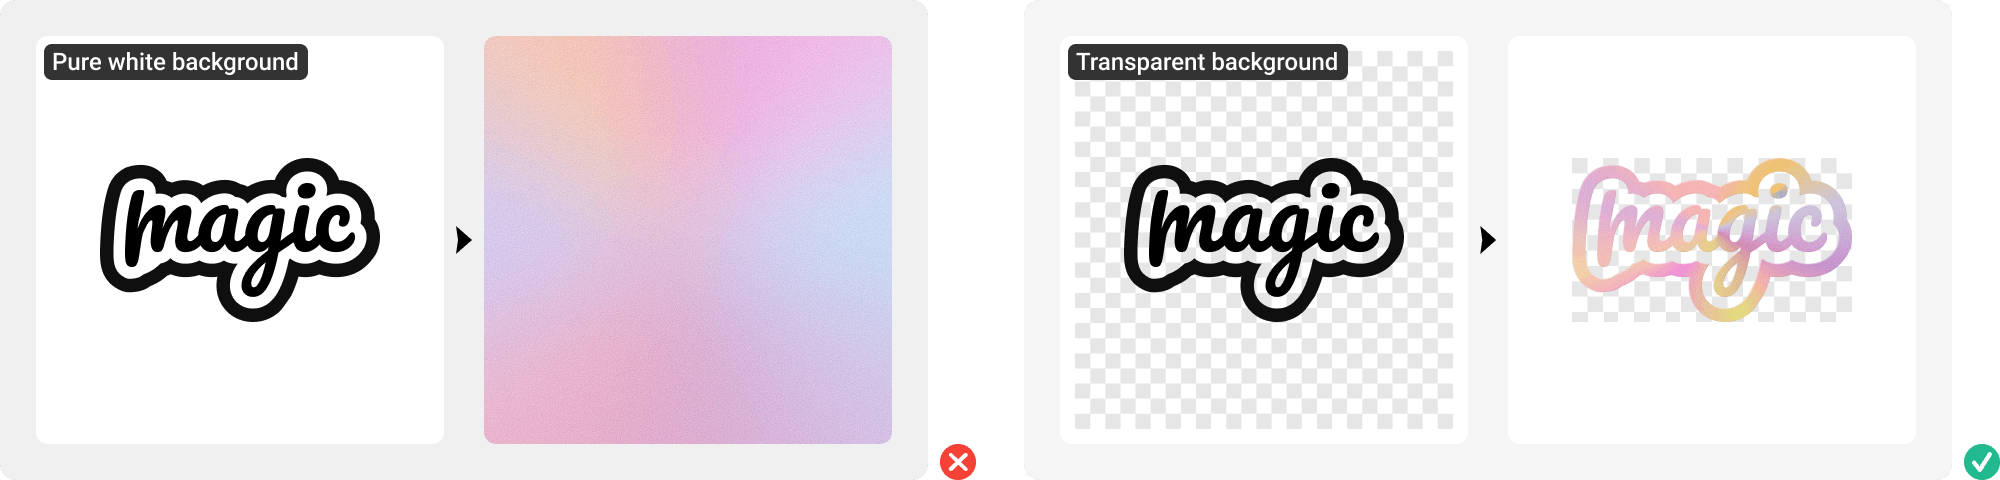
If the image has a background color, converting it into
a vinyl cutting file will result in a rectangular block.
To prevent your design from becoming a "patch," please
use high-resolution images (150dpi or higher) with a
transparent background. The edges should be clear and
free of jagged lines to ensure smooth cutting.
Do's and Don'ts
1. Do not overlap HTV designs
Avoid stacking multiple HTV designs together.
Overlapping can lead to reduced adhesion of the upper
design, making it prone to peeling or falling off after
washing.
2. Some HTV materials cannot be embroidered
Not all HTV materials are suitable for embroidery.
Special materials—especially metallic, reflective, or
thick textures—are difficult for embroidery needles to
penetrate.
3. Avoid using designs that are too small or too thin
The line width and gaps in HTV designs should not be
less than 1.5mm (0.06″). Designs that are too small or
lines that are too thin may be completely burned away
due to heat concentration during laser engraving,
resulting in missing parts or distortion.
This website uses cookies to enhance your browsing experience,
provide personalized services, and analyze site usage. You can
manage your preferences through our cookie settings. Read our
cookie policy for
more info.


 USD
USD 




 Unavailable